Contents - Click a link to skip to the section you want to read
 Intro
Intro
Electric underfloor heating is becoming more and more popular, and the quality of the products on offer seems to get better every year.
Technological advancements have meant that manufacturers can now produce UFH so thin it is barely noticeable.
Pair this up with the drop in price and you’re onto a winner.
But perhaps the biggest reason why so many of us are opting for dry over wet is the fact that it is so easy to install, especially in existing properties.
The rolled up matting with the elements already laid out makes the job a sinch, allowing you more time for cups of tea – perfect! So if you’re ready to fit your own underfloor heating system, this is what you need to know.
Which type of electric underfloor heating do you need?
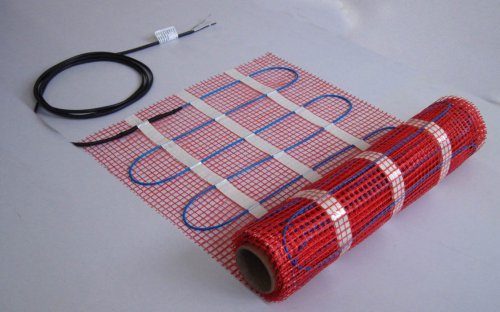
In the majority of cases, rolled heating mats are the ideal solution. However, there are instances where these are not viable and you may want to opt for loose wire instead.
Although matting can be cut – just the matting, not the wires themselves – small, unusual shaped rooms or ones with lots of obstructions can benefit from having loose wire systems. Take a look at the room and check for excessive fixtures or corners that may prevent you laying down matting successfully.
Another consideration is the type of base that you will be laying the UFH onto. Always check with the manufacturer that the matting or wires are compatible with your intended surface. We would, however, always recommend laying onto insulation boards. Insulation boards make sense for two reasons:
- They do exactly as they say, provide insulation. This ensures that you are getting the most from your UFH and that you’re not losing any valuable energy.
- They provide a nice, flat, even base on which to work.
Similarly it’s worth checking that the UFH that you choose is also suitable for the flooring that is going to be laid on top of it. If you are looking to warm up laminate flooring, then underfloor heating foil is the way to go. Tiles and the like need electric underfloor heating mats or loose wire systems.
As matting is the most popular, that is what we are going to be looking at in this particular article.
Step 1 – Measure up
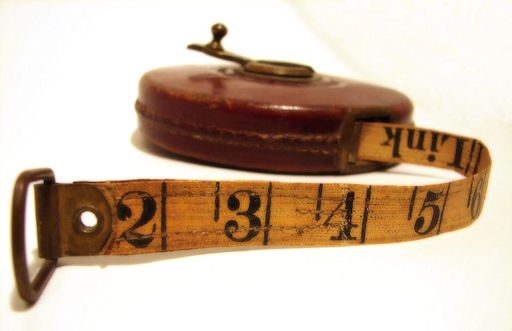
Image via Wiki Commons
Get your tape measure out, along with a pencil and pad, and start to put your rooms measurements down on paper.
It’s best to draw a rough sketch of the room, rather just the measurements, as this will help to prevent any mistakes.
Once you have your room on paper, along with measurements and existing fixtures, you will be able to calculate the area that will need to be covered by your UFH matting.
Remember to subtract the areas where the fixtures will be and to also leave around 40 to 50mm around the edge of the room.
The wiring will not be laid flush to the wall. Many fitters also recommend that you subtract 10% from the final calculation so that you have some room to play with when you come to lay the matting down.
If you are going to be laying your UFH mat onto an existing floor but intend to remove any fixtures such as toilets or bath panels before doing so, make sure you mark these areas first.
Drawing an outline with a permanent marker will allow you to see exactly where each fixture will be once replaced, and stop you from laying matting where it isn’t needed.
Step 2 – Insulate the floor
Laying down the insulation correctly will make your electric underfloor heating system run much more efficiently, saving you money in the long run.
In order to show you exactly how to do this we have created a separate step-by-step guide on floor insulation for you to follow. If you haven’t already taken a look it’s advisable to do so before proceeding any further with the project.
Step 3 – Identify the power source
Find out where the power source for your electric underfloor heating mat is and make the necessary hole in the wall for the cabling (your electrician can do this for you if you’re unsure).
Cut a conduit into the floor/insulation board to accommodate the flexible pipes that will encase the floor sensor and power cables. This is essential as the power end of the matting will be significantly thicker than the rest so it will need a recess to fit into.
Once cut away, clean the area thoroughly to remove any dust, grease and debris before continuing.
Step 4 – Testing, testing…
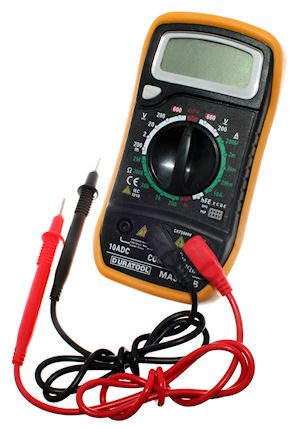
Image via Wiki Commons
Before you begin the fun part of laying your matting in place you’ll need to give it a quick resistance test with a multimeter to make sure that it’s in good working order. Plenty of people have come unstuck with this in this past, don’t be one of them!
As soon as the mat’s out of the box get the multimeter on it.
Not got a good multimeter? Buy one here.
The measurement you’re looking for is between the live and neutral cables and it should match up with the data sheet that comes with the matting. These vary according to the size and type of matting so be sure to check the data sheet for each one if you are kitting out multiple rooms.
As long as the readings match up with those shown in the manual you’re good to go. Be aware that there is usually a base figure given as a guideline with a range (usually around 5%) of both plus and minus either side of this number.
The manual/data sheet will tell you both the range and base figure. As long as your reading falls between the low and high end of this range your matting is in good shape.
If, however, there is a discrepancy between your reading and the range shown in the manual the mat could be faulty. Although it’s a pain, the matting will need to be returned; it’s far better to get it sorted now rather than later.
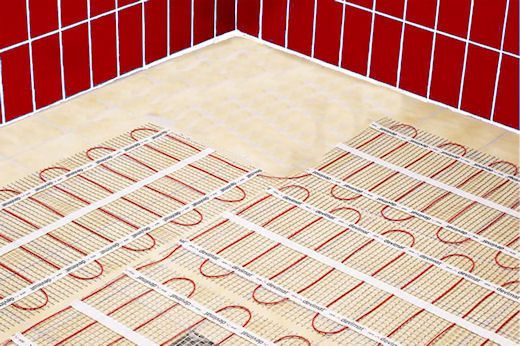
Step 5 – Laying it down
 ‘Well, this bit’s easy. I won’t need to read this’.
Sure, it’s just a case of putting the power end of the matting down by the recess and rolling it out, right? Well it is but you’d be surprised at how many people are stumped by what to do once they reach a wall. Or, heaven forbid, a sink pedestal or toilet base!
When your matting does reach an obstacle such as this it’s best to stand back for a minute and look. Really, look.
Take notice of where the wire is within the mesh of the matting and figure out where your cut needs to be in order to be able to flip the mat and continue. The direction in which you want to flip the mat will define were the cut should go.
The ‘U’ bends in the wire at the edge of the matting will open up to form a continuous link once the mesh below has been cut, allowing you to turn the mat back on itself and continue rolling.
Now, the following may sound obvious to many of you, but it’s happened on lots of occasions in the past. DO NOT, I REPEAT, DO NOT CUT THE WIRE. Cutting through the mesh is fine. Cutting through the self-adhesive tape is fine. Cutting through the wire is not fine…not fine at all.
Once you’ve successfully negotiated the first obstacle you can roll out the mat again until you reach another where you will have to repeat the process above. After all cuts have been made and the matting is fully rolled out, your entire room should be covered if your calculations were correct.
Oh, and another tip I would give is to only remove the backing from the self-adhesive tape (should your matting have it) once you’re entirely happy with the layout of your mat. If you start sticking it down right at the beginning your leaving yourself no wiggle room…and you’ve gotta have a little wiggle. Instead just lay it down and make any minor adjustments to ensure it’s right where you want it…then stick that bad boy in place.
Step 6 – Position the probe
Now the electric underfloor heating mat is laid we need to get the sensor in place so that our thermostat will know the temperature of the UFH. It’s always best to place the probe as close to the centre of the elements as possible as this will give the most accurate reading and a bit of tape will help to keep it in place.
However, there are a few other things to remember when positioning the probe too:
- The probe cannot cross any of the wires. If it does, it will give a false reading, which we obviously want to avoid.
- The probe should be placed underneath the mesh, not laid on top.
- The probe must be at least 150mm (6″) away from the wall.
- Link the probe as close to the power source as possible.
- Much like the power source, the probe is quite thick. Cutting a conduit will maintain a level surface and help to protect the probe as well.
Step 7 – Test again
Now everything is in place it’s multimeter time again. Same test as before. If your reading is good, congratulations! You’ve just successfully fitted underfloor heating into your home.
All that remains now is to call up a qualified electrician to make the final connections, then you can either begin screeding or simply tile directly on top of the matting (your user manual will guide you on the best option).
As you can see, laying electric matting really is a simple job, and it’s this simplicity that has helped dry underfloor heating’s popularity soar over recent years.
Let us know how you get on in the comments below. You can even send us your pictures via social media or email, we might just feature them on a brand new page devoted to your installation pics.
Good article, thank you, a lot of useful information, I will do so.